0
Skip to Content
Musings
Gallery
Explore
About
Contact
ALL POSTS
Open Menu
Close Menu
Musings
Gallery
Explore
About
Contact
ALL POSTS
Open Menu
Close Menu
Musings
Gallery
Explore
About
Contact
ALL POSTS
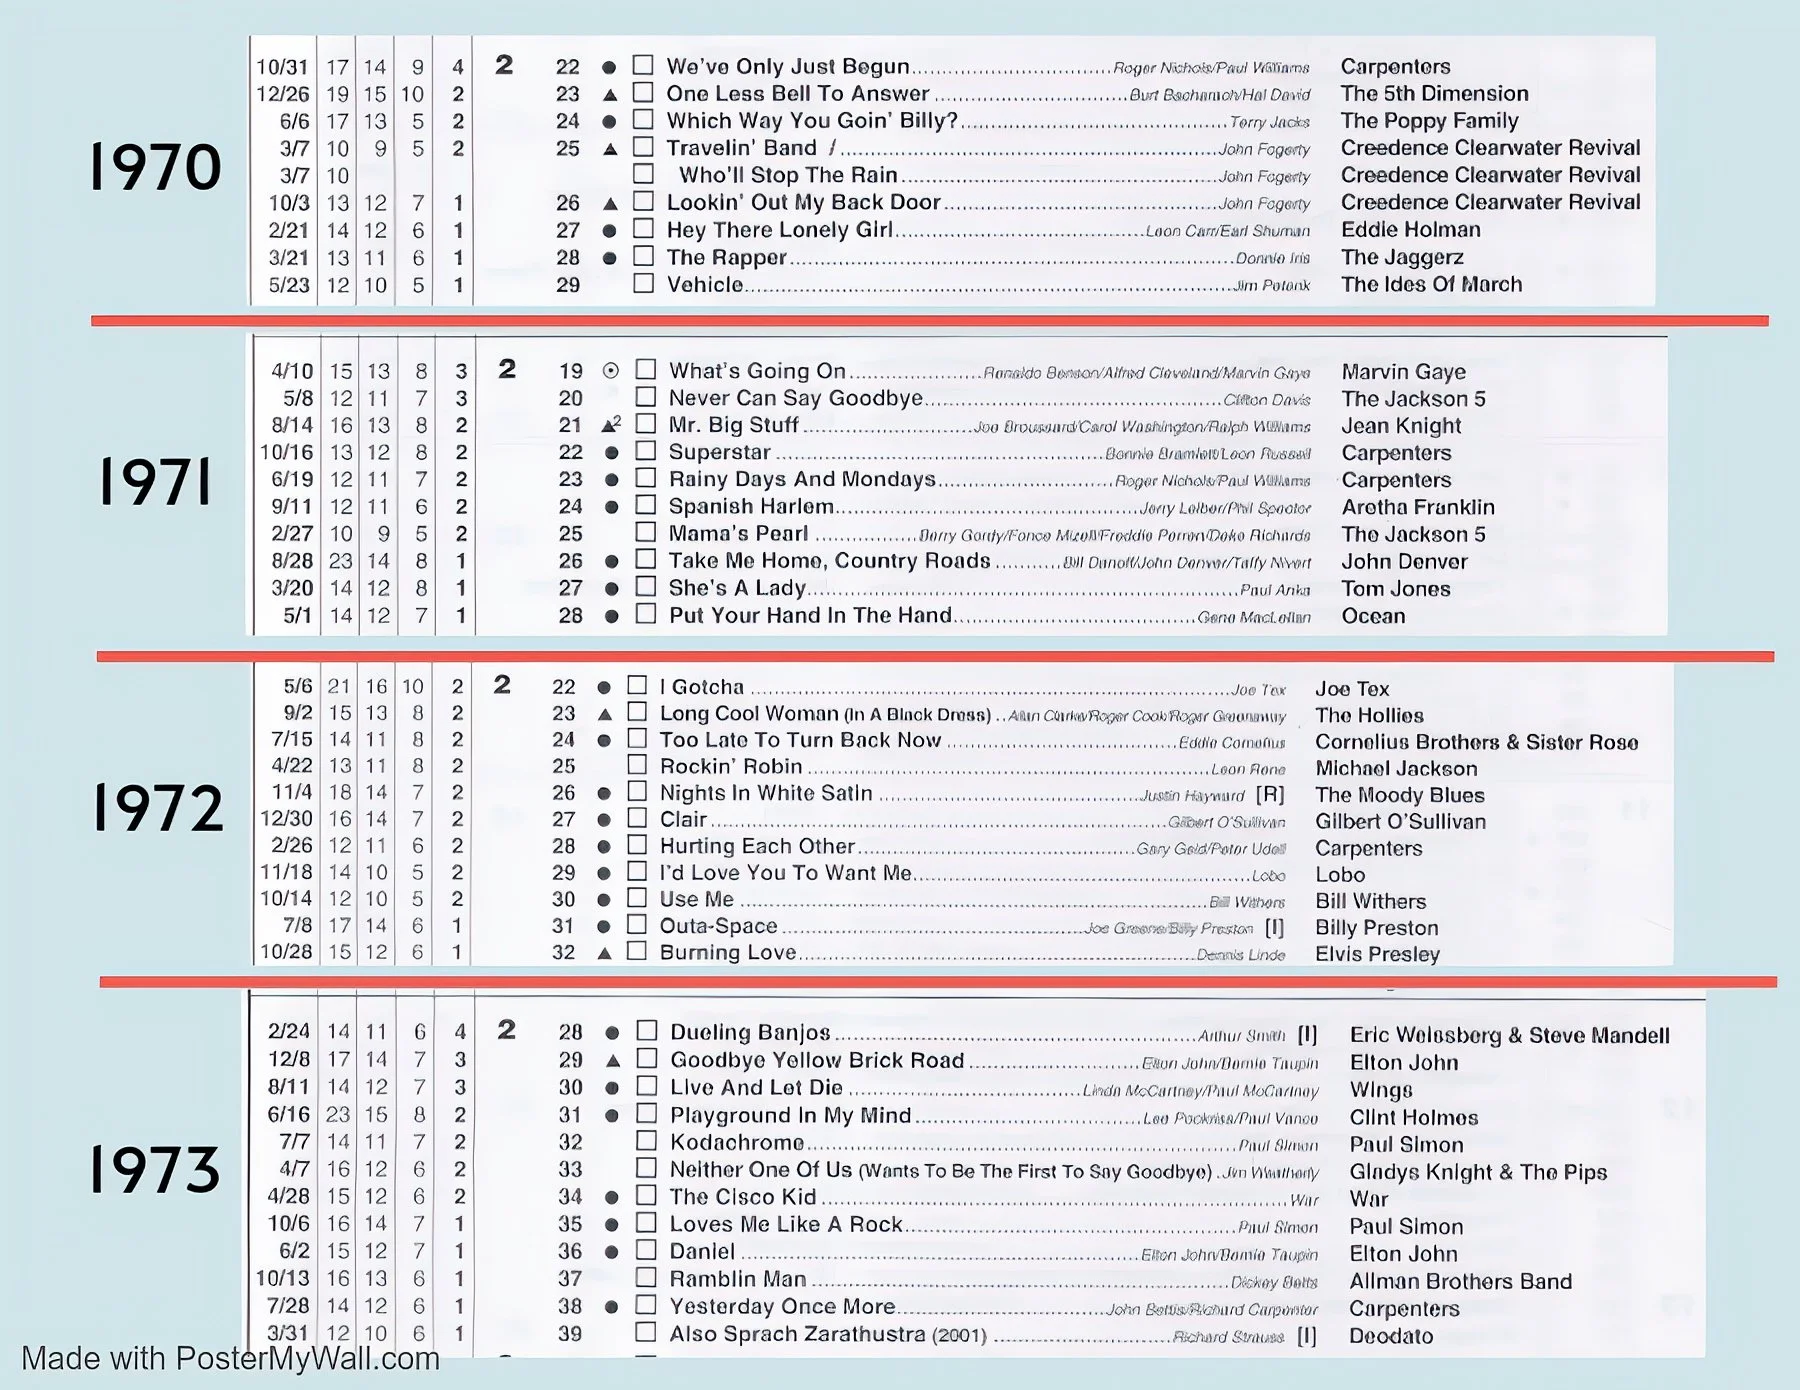
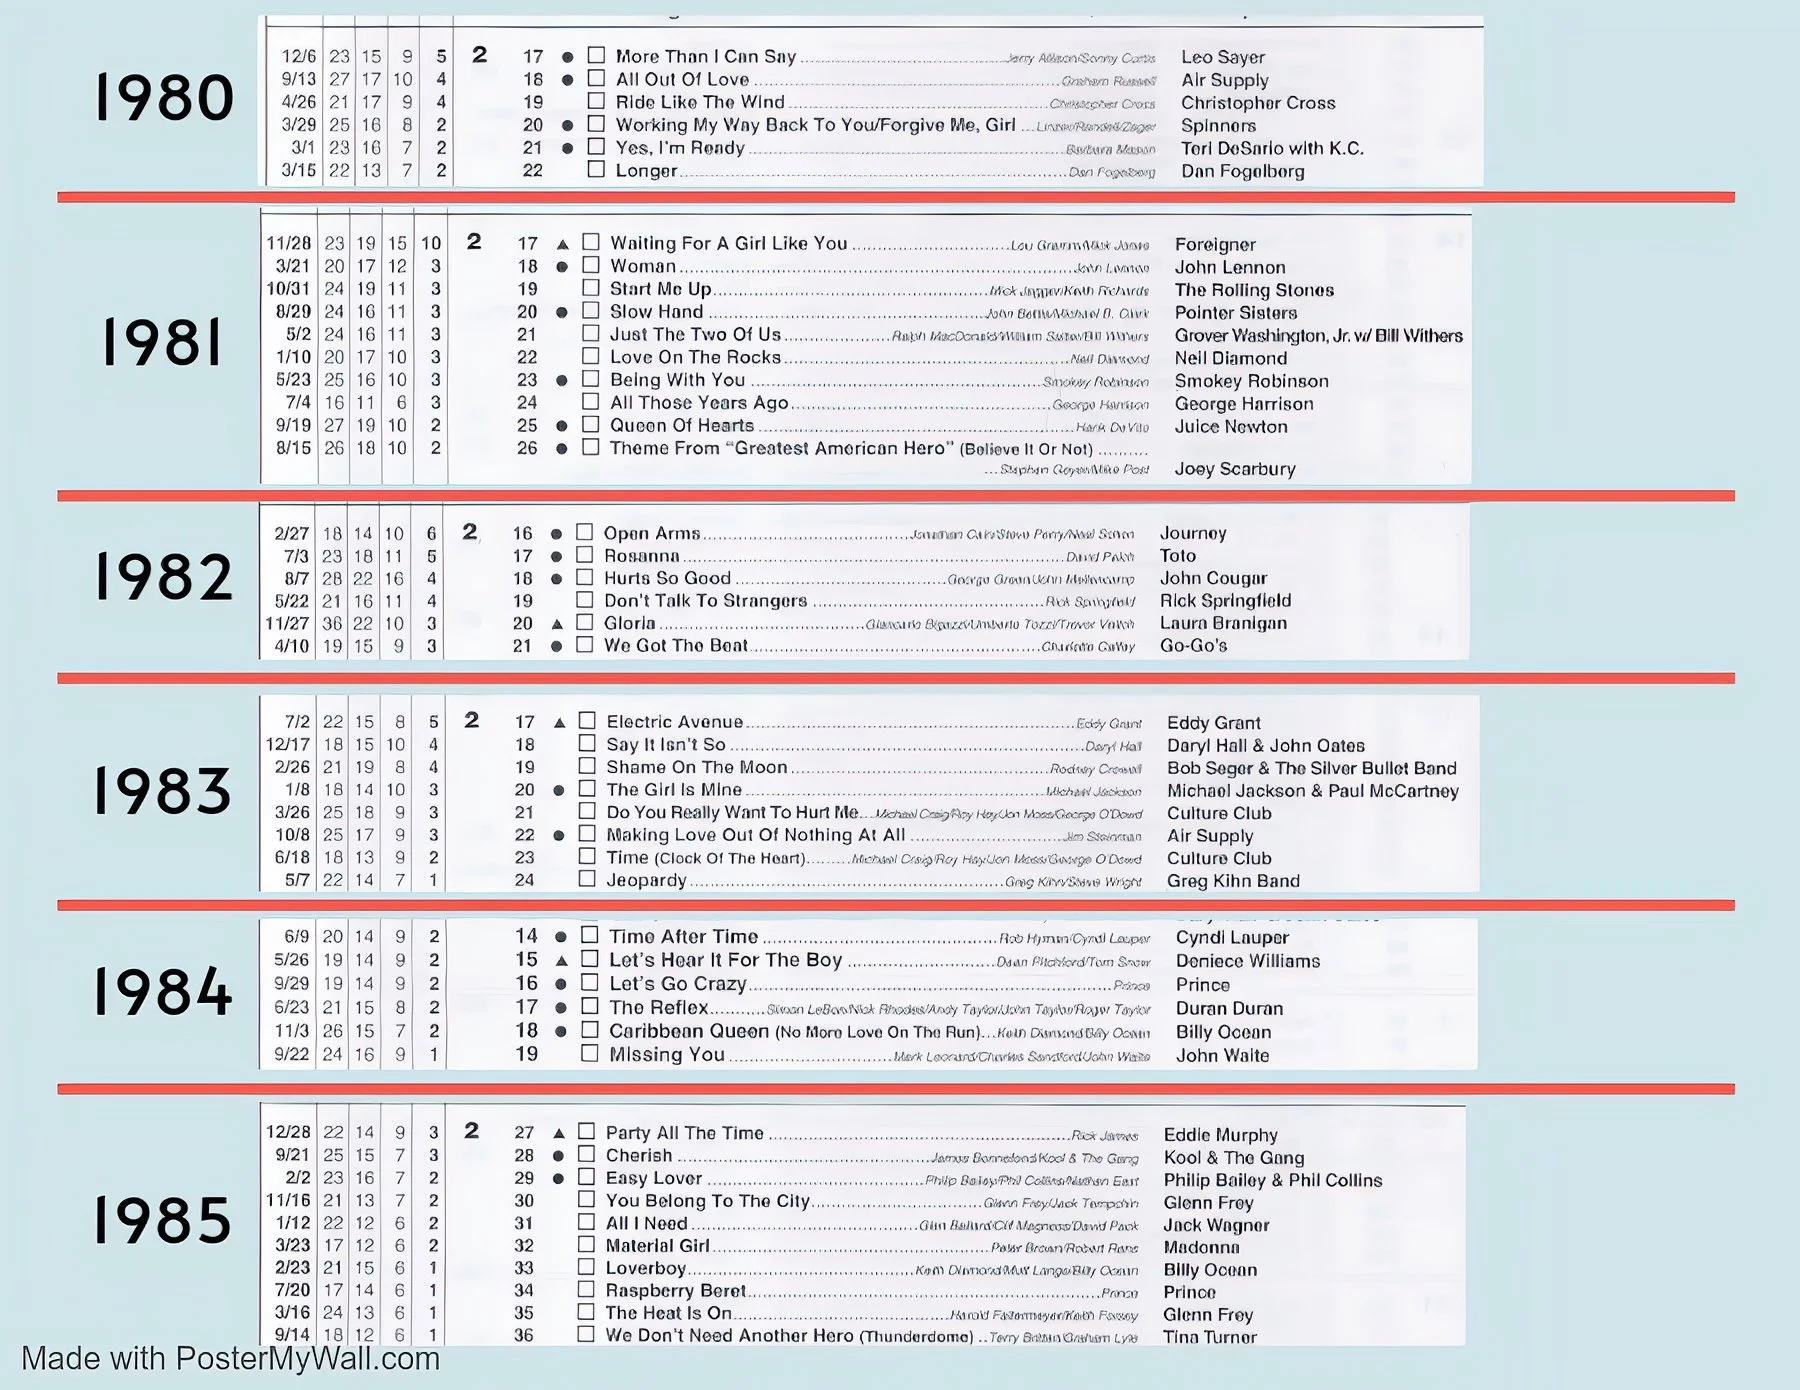
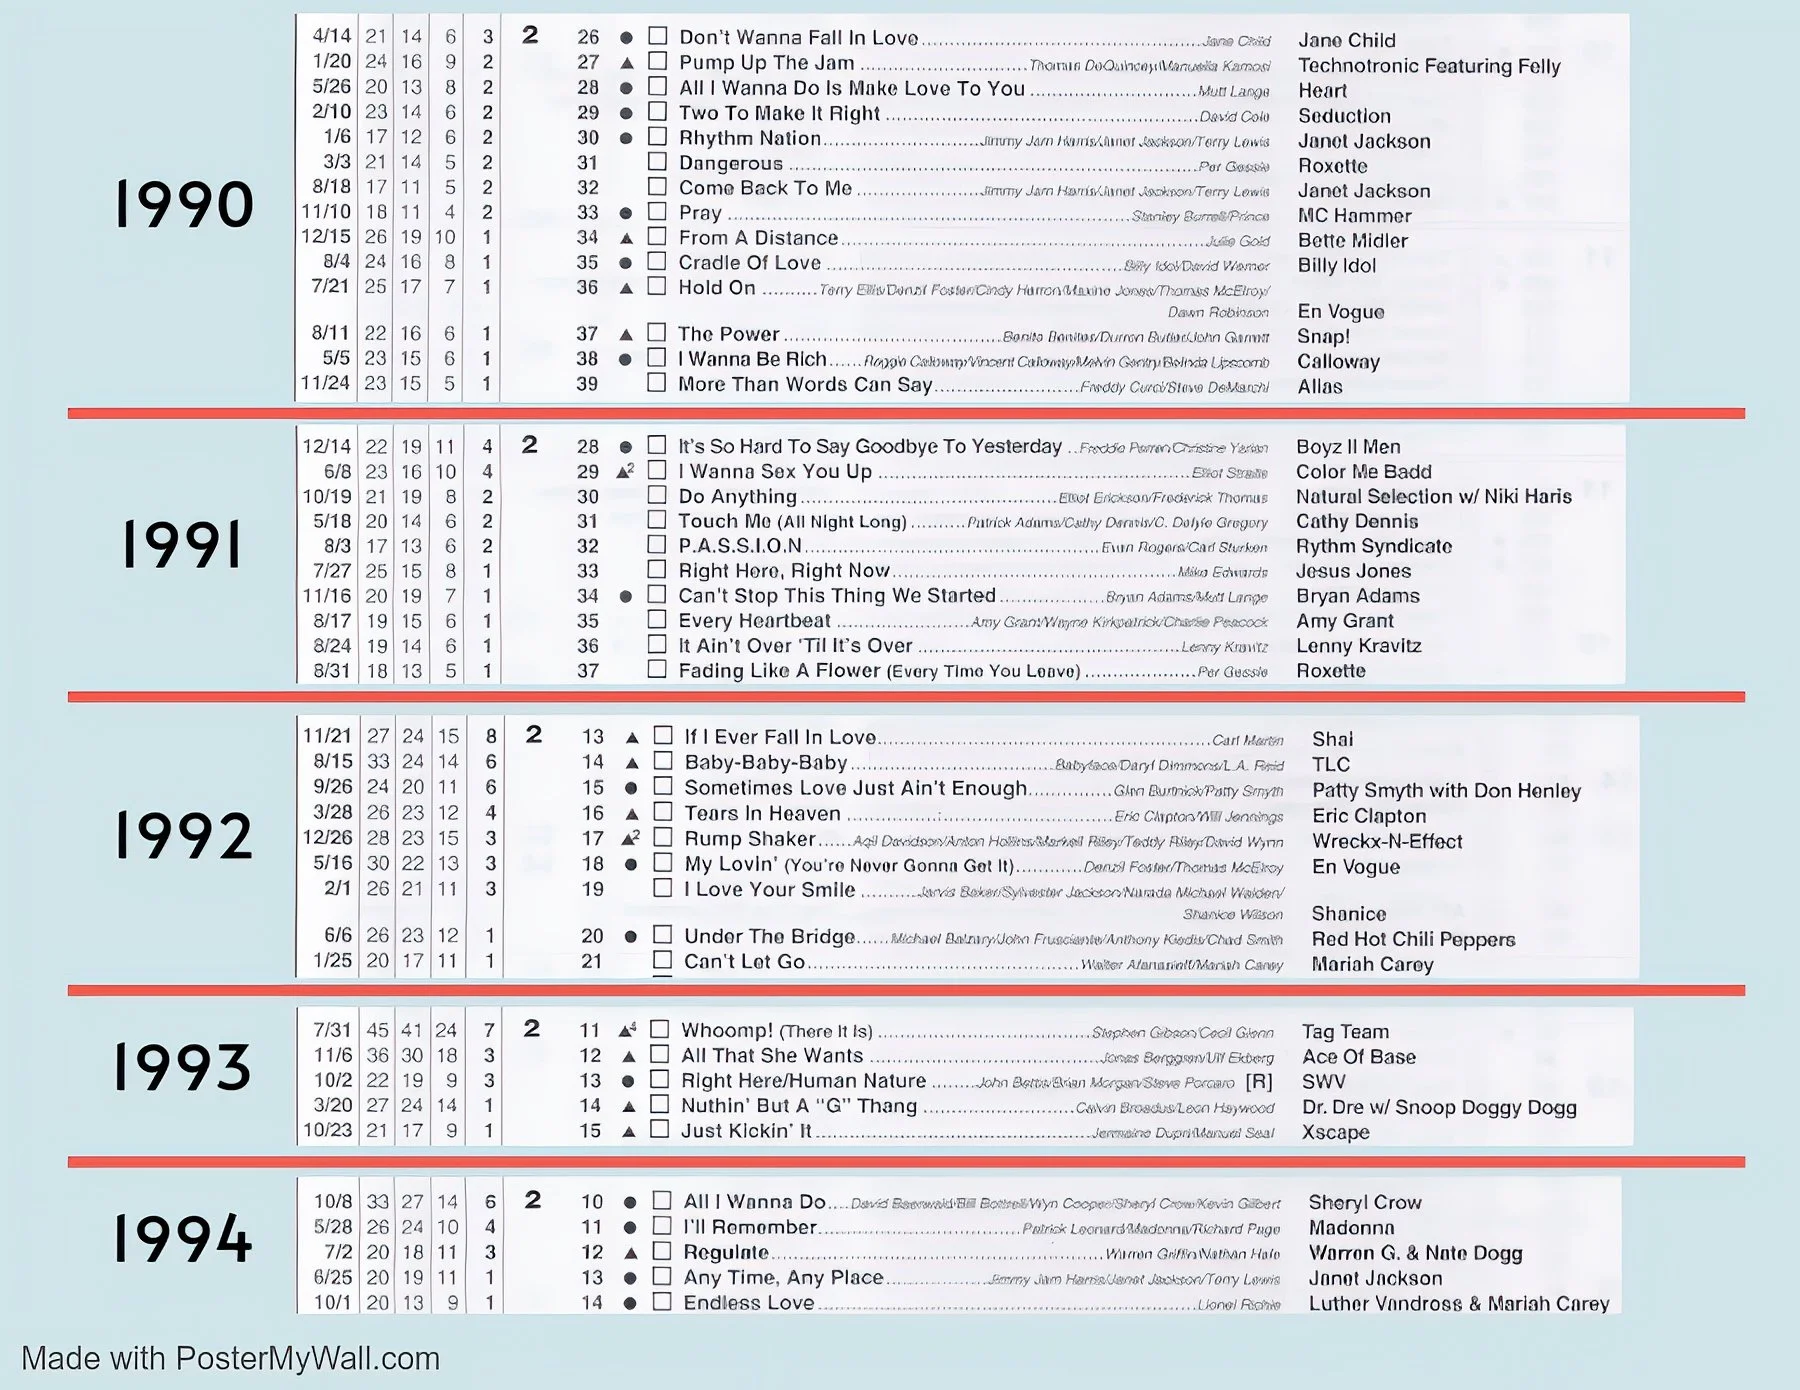
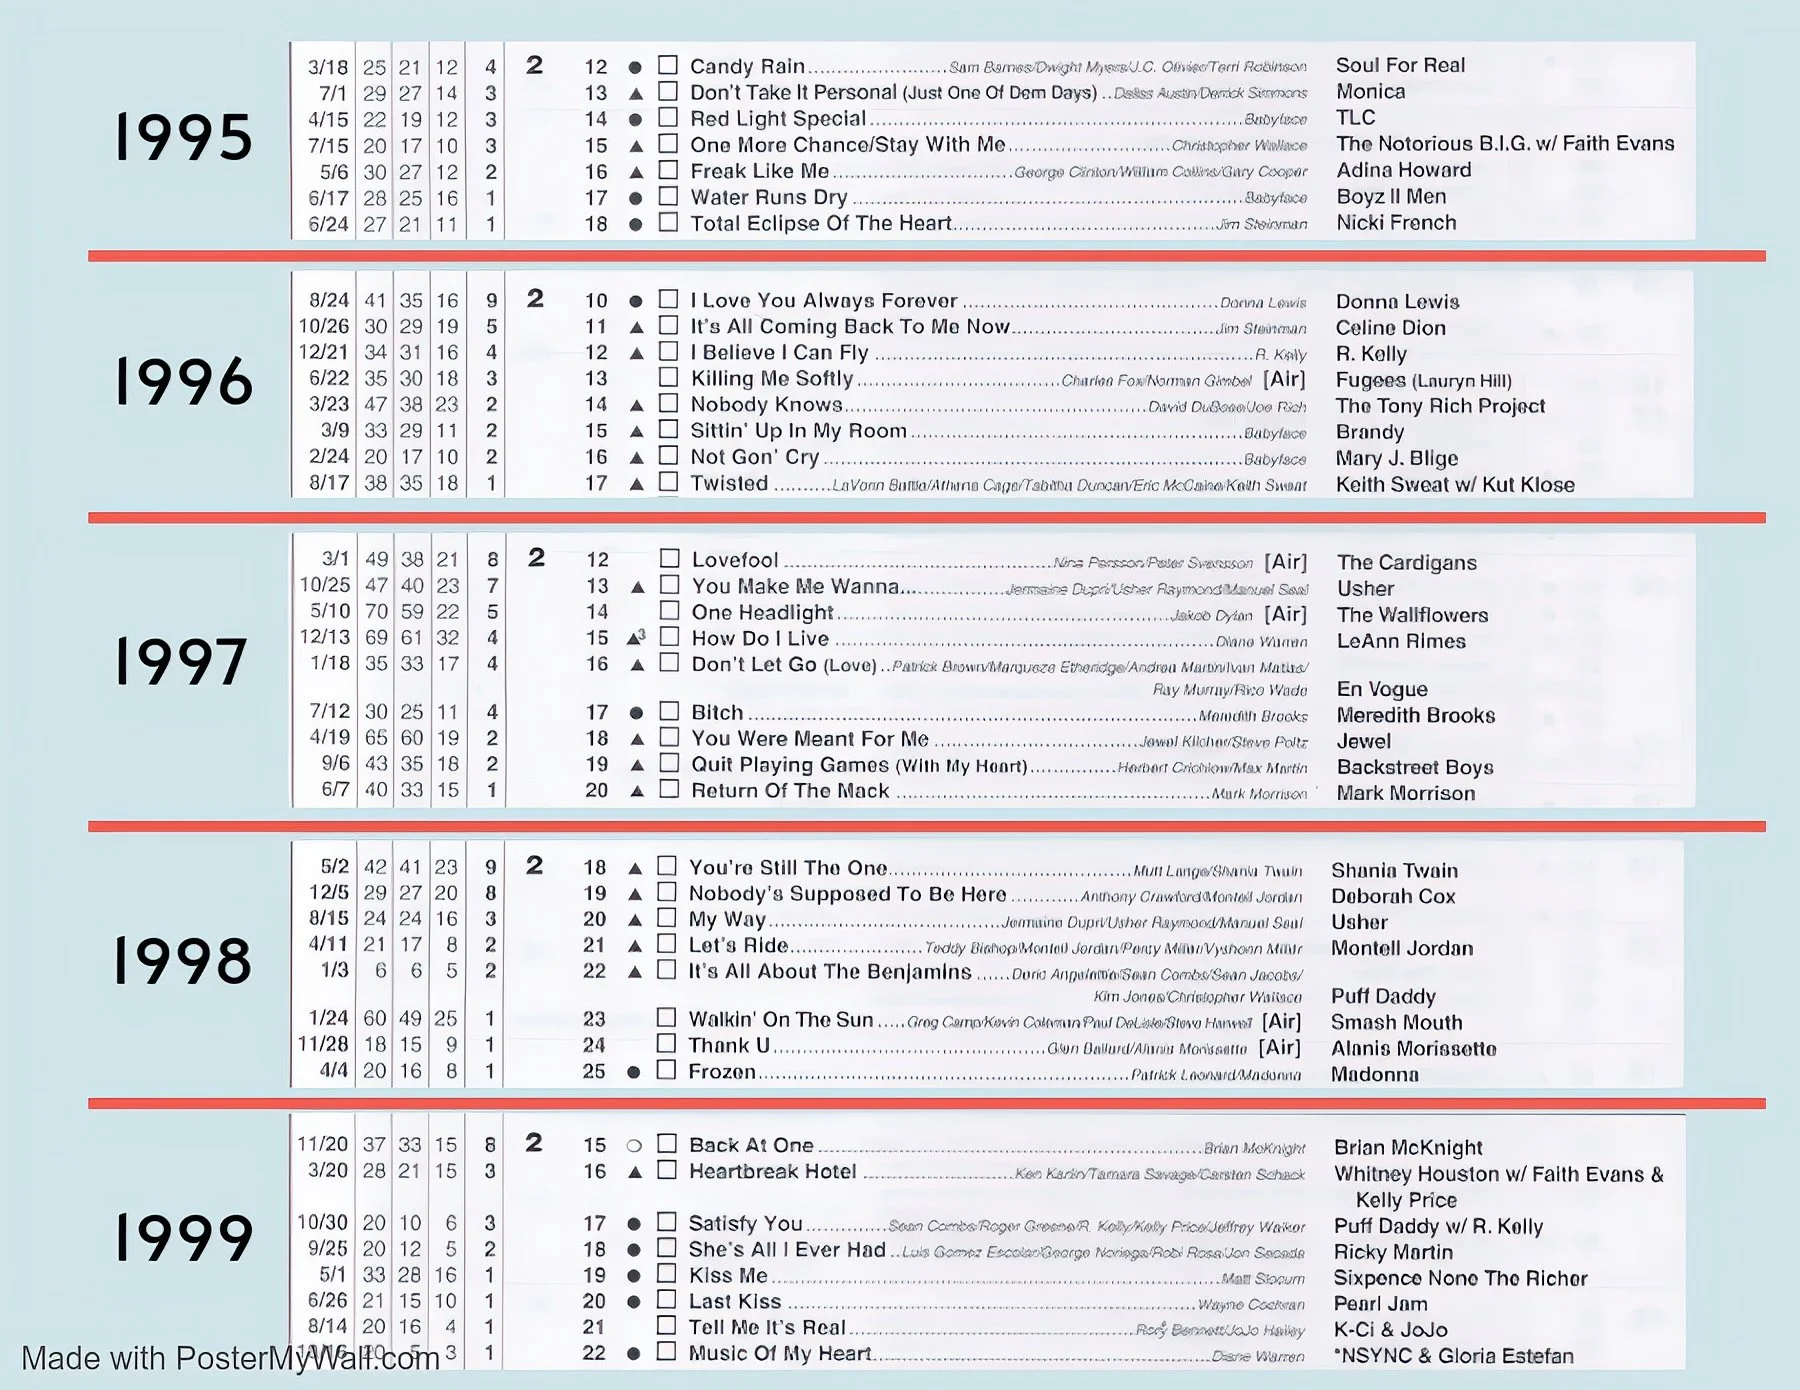
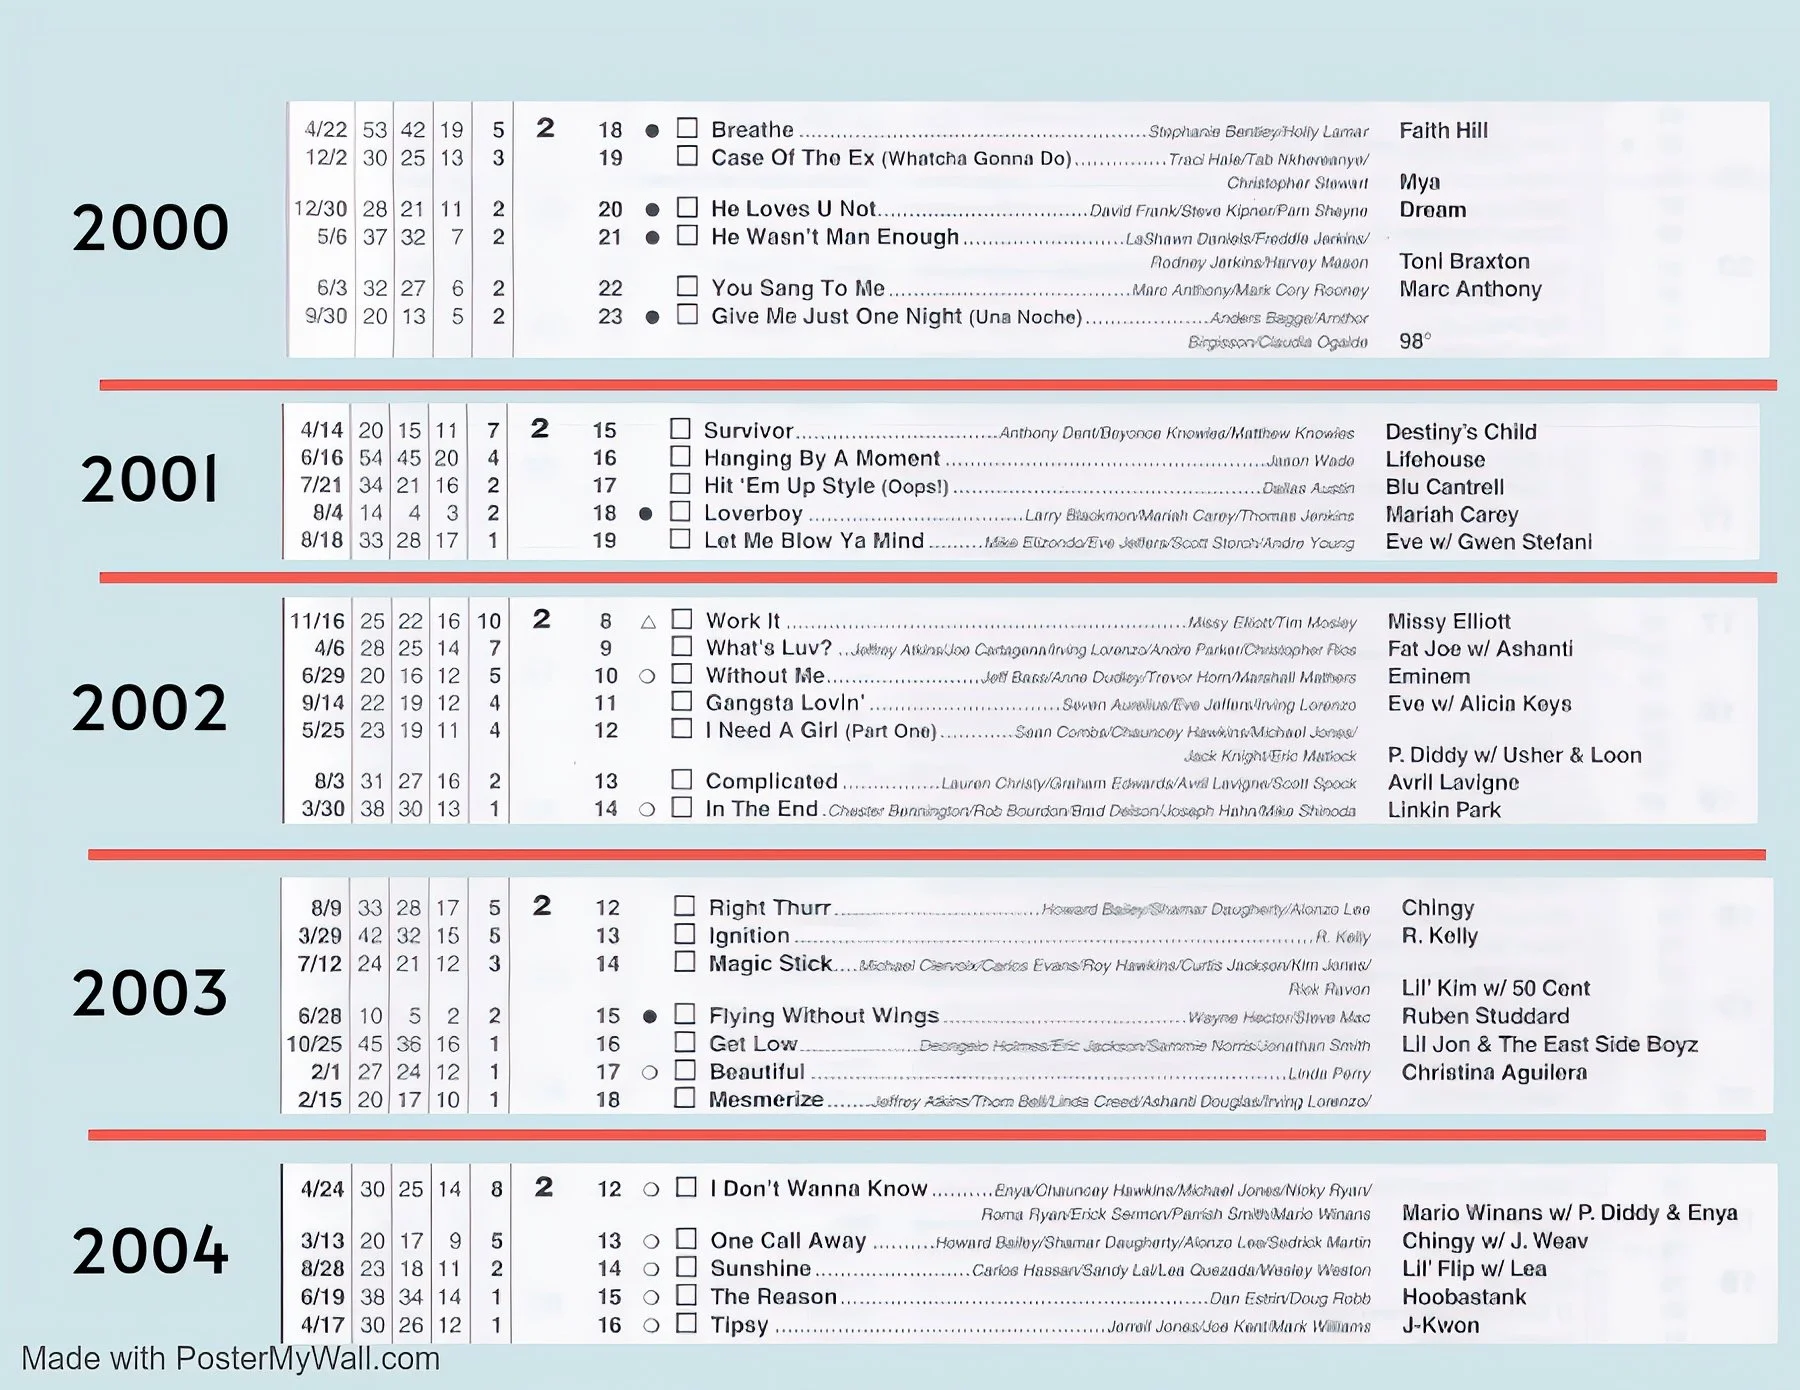
#2 - SECOND TO ONE